23 Cute Cupid Nails Tutorials You Must Try

Get ready to fall in love with your nails all over again! This guide explores cute Cupid-inspired nail tutorials perfect for spreading a little love. Whether you are prepping for Valentine’s Day or just want to add some romance to your everyday look, these designs are simple to achieve at home. You don’t need fancy tools or a salon visit to get a stunning manicure. We will show you how to create gorgeous nails on a budget, using items you likely already have or can find easily. Let’s make your fingertips adorable and love-themed without any fuss.

- Classic Red Heart Accents
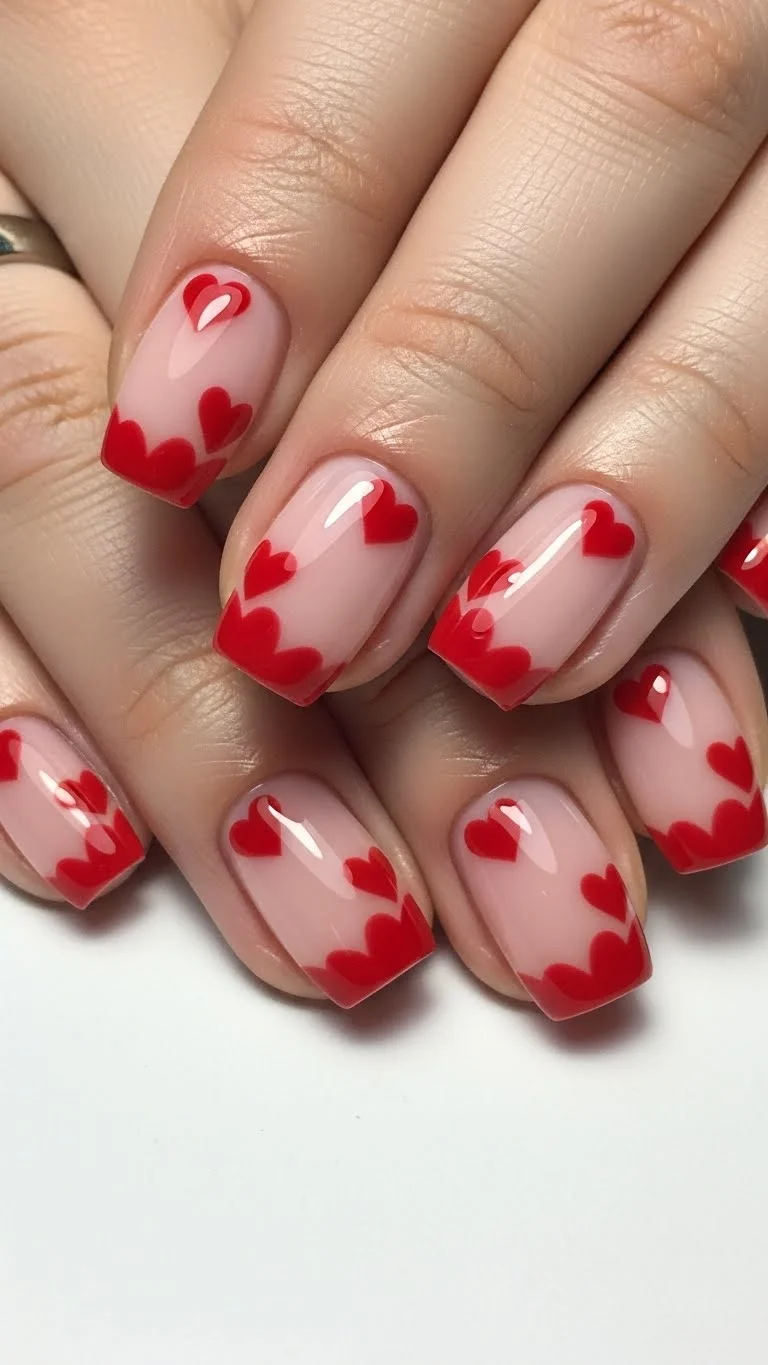 Creating classic red heart accents is a sweet way to show off your romantic side. Start with a clear base coat to protect your nails. Apply two thin coats of a soft pink or nude polish for a subtle background. Once dry, use a dotting tool or a toothpick dipped in red nail polish to create small hearts. For a heart shape, place two dots side-by-side, then drag the polish downwards from the center of the dots to form a point. Practice on a piece of paper first to get the hang of it. Finish with a glossy top coat for durability and shine. This look is elegant and timeless, perfect for any occasion. It is super budget-friendly, requiring just a few basic polish colors.
- Tiny Gold Arrow Details
![]() Tiny gold arrow details bring a playful and chic touch to your nails. Begin with a base of a muted color like matte white, light blue, or even a pale gray. Let this dry completely. For the arrows, you have a couple of options. You can use small gold nail art stickers, which are super easy to apply with tweezers. Press them down firmly and seal them with a top coat. Alternatively, use a very fine nail art brush and gold metallic polish to hand-paint tiny arrows. Keep the arrows small and simple for the best effect. A clear top coat will protect your design and add shine. This DIY approach saves money and gives you a personalized look.
Tiny gold arrow details bring a playful and chic touch to your nails. Begin with a base of a muted color like matte white, light blue, or even a pale gray. Let this dry completely. For the arrows, you have a couple of options. You can use small gold nail art stickers, which are super easy to apply with tweezers. Press them down firmly and seal them with a top coat. Alternatively, use a very fine nail art brush and gold metallic polish to hand-paint tiny arrows. Keep the arrows small and simple for the best effect. A clear top coat will protect your design and add shine. This DIY approach saves money and gives you a personalized look.
- Pastel Pink & White Ombre with Glitter
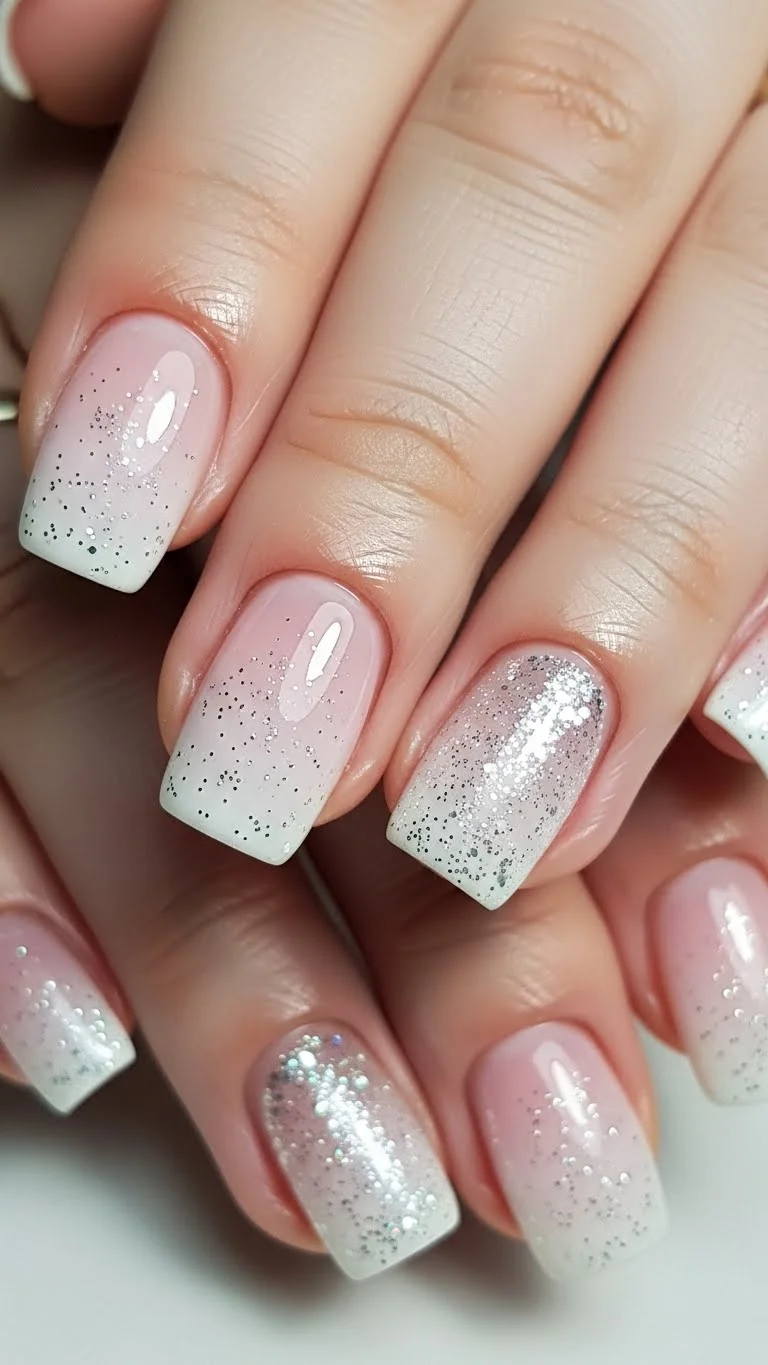 Achieve a dreamy pastel pink and white ombre with a touch of glitter for a romantic manicure. Start with a base coat. Paint your entire nail with white polish. While it is still slightly tacky, dab a small makeup sponge with both white and pastel pink polish. Gently press and lift the sponge onto your nail, moving it slightly to blend the colors. Repeat a few times until you get a smooth gradient. Once dry, apply a thin layer of glitter polish or sprinkle loose glitter onto a wet top coat. Seal everything with a clear top coat. This technique might take a little practice, but it’s very rewarding and much cheaper than a salon visit.
- Cupid’s Bow French Tips
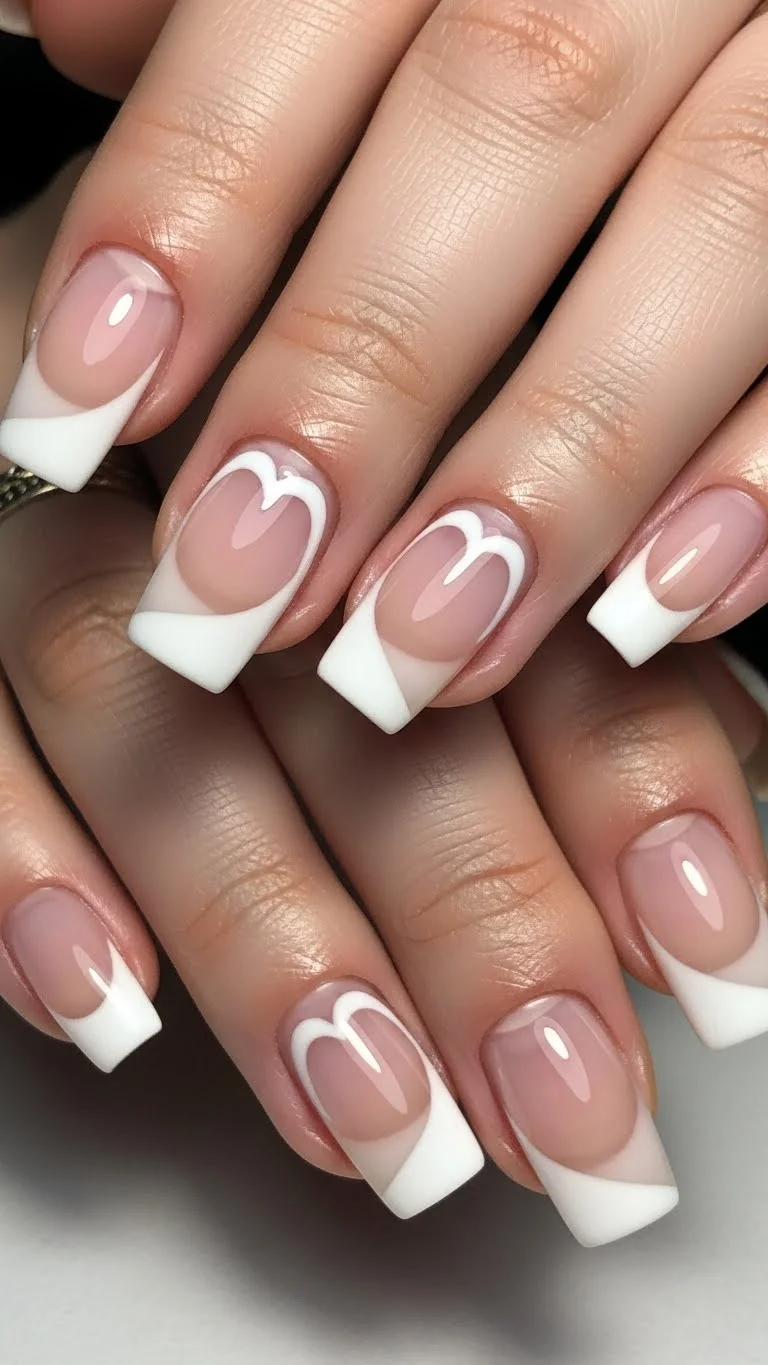 Give your classic French tips a romantic upgrade with a Cupid’s bow design. After applying a base coat and a nude or clear base polish, you will create the “bow” shape. Instead of a straight or gently curved tip, create a slight dip in the center of the white tip line. This makes the tip look like the top curve of a heart or Cupid’s bow. Use a nail art brush for precision, or even a piece of tape cut into the desired shape. Apply white or soft pink polish for the tips. Finish with a clear top coat. This subtle change makes a big difference and adds a unique, loving touch to a traditional style.
- Accent Nail with Mini Hearts
 An accent nail with mini hearts is a charming way to incorporate Cupid’s theme without going overboard. Choose a solid color for most of your nails, such as a deep red, soft peach, or even a sophisticated gray. For one accent nail, often the ring finger, create a canvas of tiny hearts. You can paint these using a very fine dotting tool and a contrasting polish color like white, gold, or silver. Alternatively, use mini heart-shaped nail stickers for an even easier application. Space them out or cluster them for a playful look. Finish with a top coat to secure your tiny designs. This method is quick, easy, and affordable.
- Glitter Fade with a Single Heart
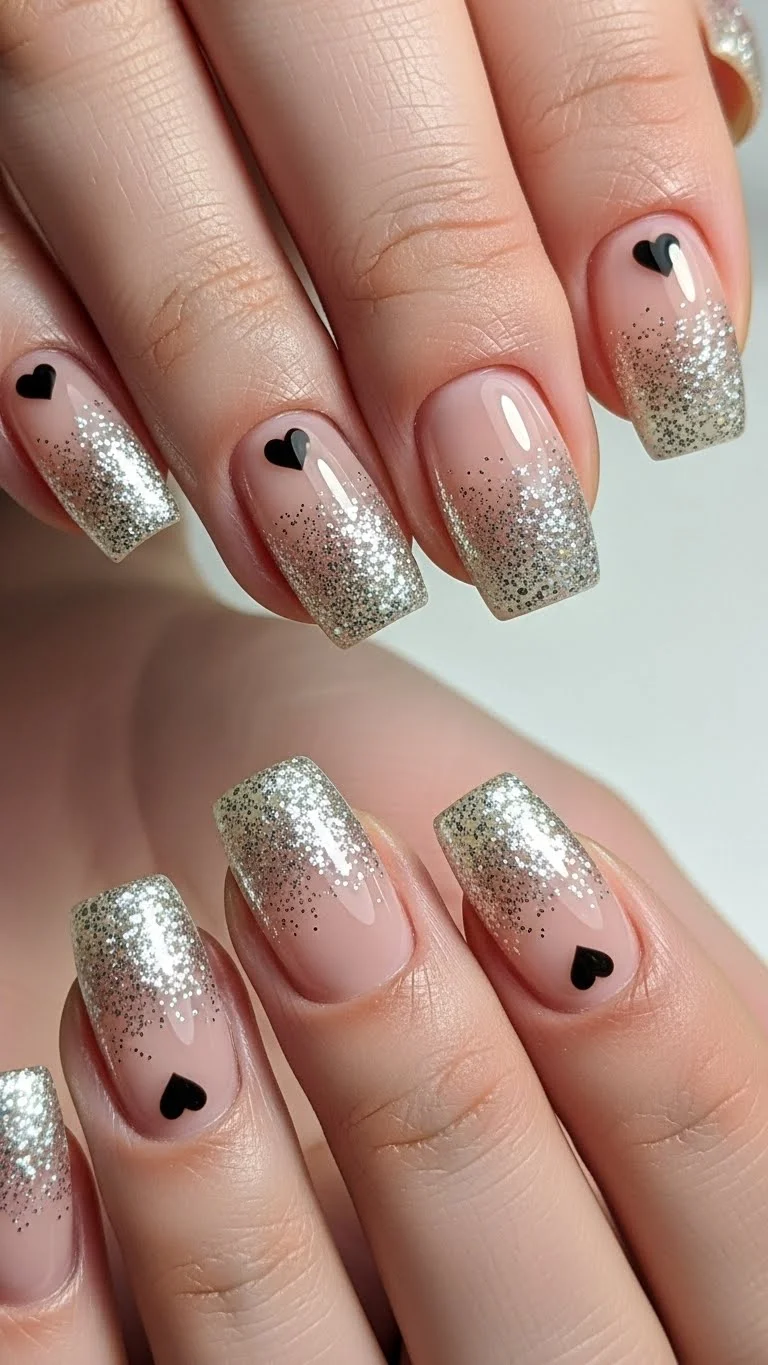 Combine sparkle and sweetness with a glitter fade leading to a single heart. Start with a light base color, like nude or pale pink. Apply a clear glitter polish, concentrating most of the glitter at the tips of your nails and lightly brushing it down towards the center to create a fade effect. Let this dry. Next, use a small heart sticker or a dotting tool and a contrasting polish to place a single, small heart near the cuticle of each nail. White, red, or gold hearts work well. A final top coat will seal everything and add extra shine. This look is glamorous yet understated, perfect for a romantic evening.
- Negative Space Hearts
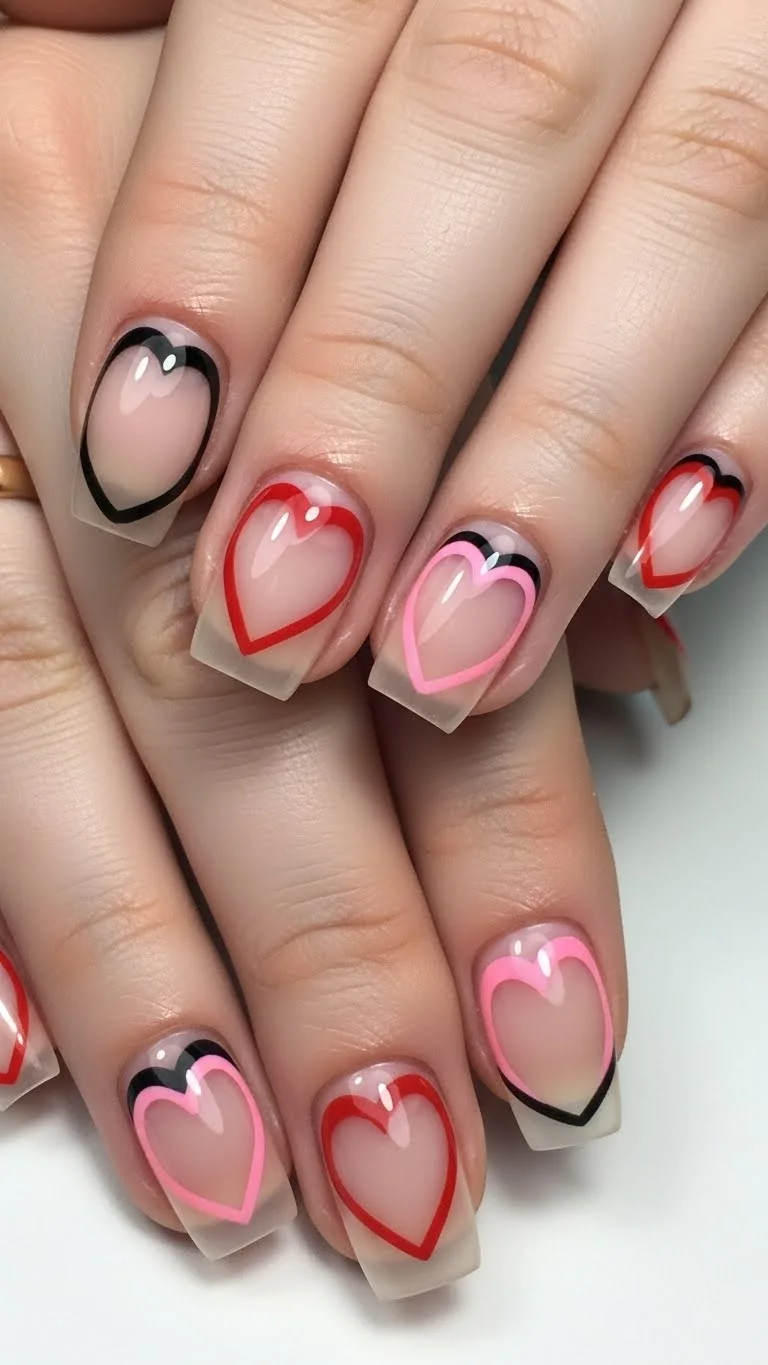 Negative space hearts are a modern and chic way to embrace the love theme. Begin with a clear base coat or a sheer nude polish. For this design, you’re going to use the natural color of your nail to form the heart. You can use small heart-shaped nail stencils. Place the stencil on your nail, paint over it with your chosen color (red, pink, or even a metallic), and then carefully remove the stencil while the polish is still wet. Alternatively, use a fine brush to outline a heart shape and fill in the area around it, leaving the center clear. A top coat will complete this stylish look. It is a minimalist approach that is very effective.
- Polka Dot Hearts
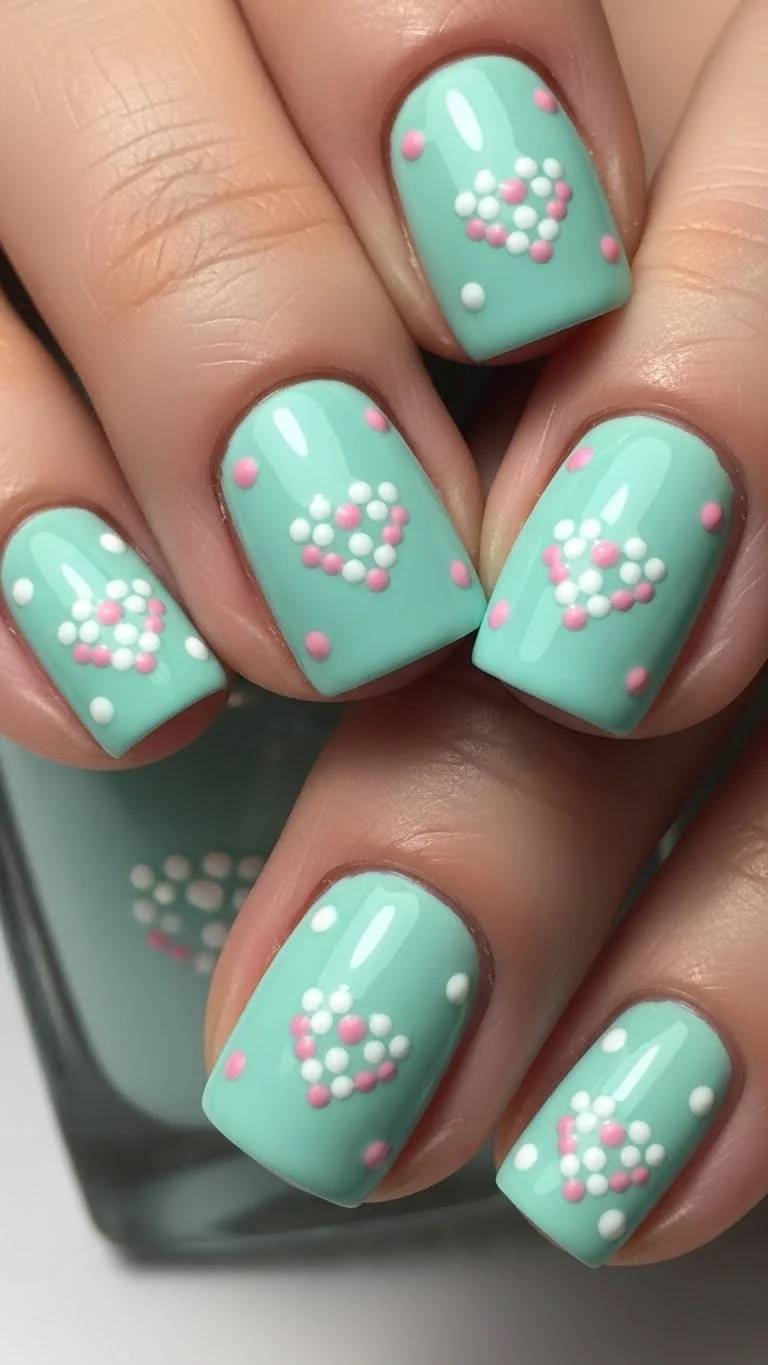 Polka dot hearts offer a playful and whimsical manicure. Start with a fun base color, such as a cheerful light blue, mint green, or sunny yellow. Once dry, use a dotting tool and a contrasting polish (like white or pink) to create polka dots. To form hearts, place two dots close together, then drag a toothpick or fine brush from the center of those two dots downwards to create the point of the heart. You can alternate between single polka dots and polka dot hearts for variety. Seal your design with a clear top coat. This look is easy to customize and very cute, perfect for a casual day out.
- Matte Finish with Glossy Hearts
 A matte finish with glossy hearts creates a sophisticated and interesting texture contrast. First, apply your chosen nail color, like a deep burgundy, dusty rose, or even a soft gray. Once completely dry, apply a matte top coat over all your nails. This will give them a velvety, non-shiny appearance. After the matte top coat is dry, use a fine nail art brush or a toothpick dipped in a regular glossy top coat to paint small heart shapes onto your nails. The clear glossy hearts will stand out against the matte background, making a subtle yet striking statement. This affordable trick looks very high-end.
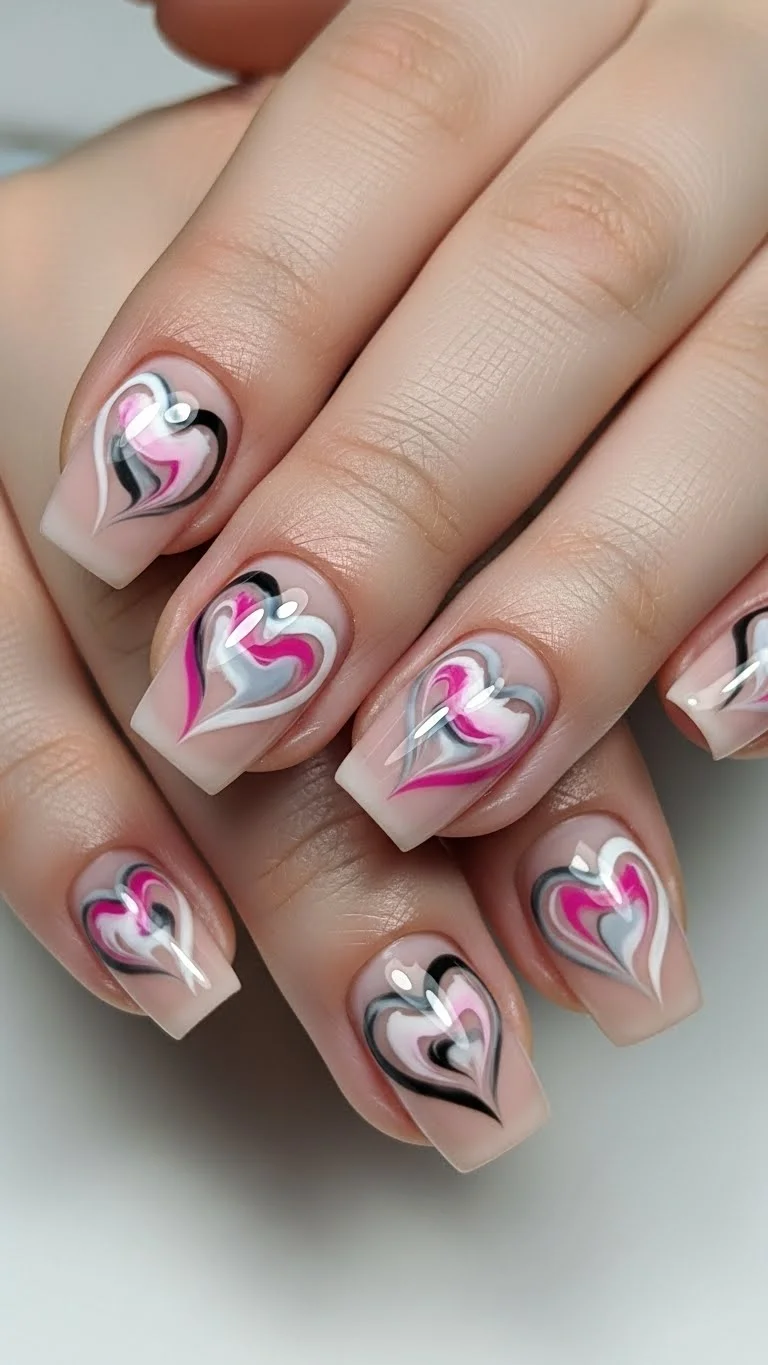
- Abstract Heart Swirls
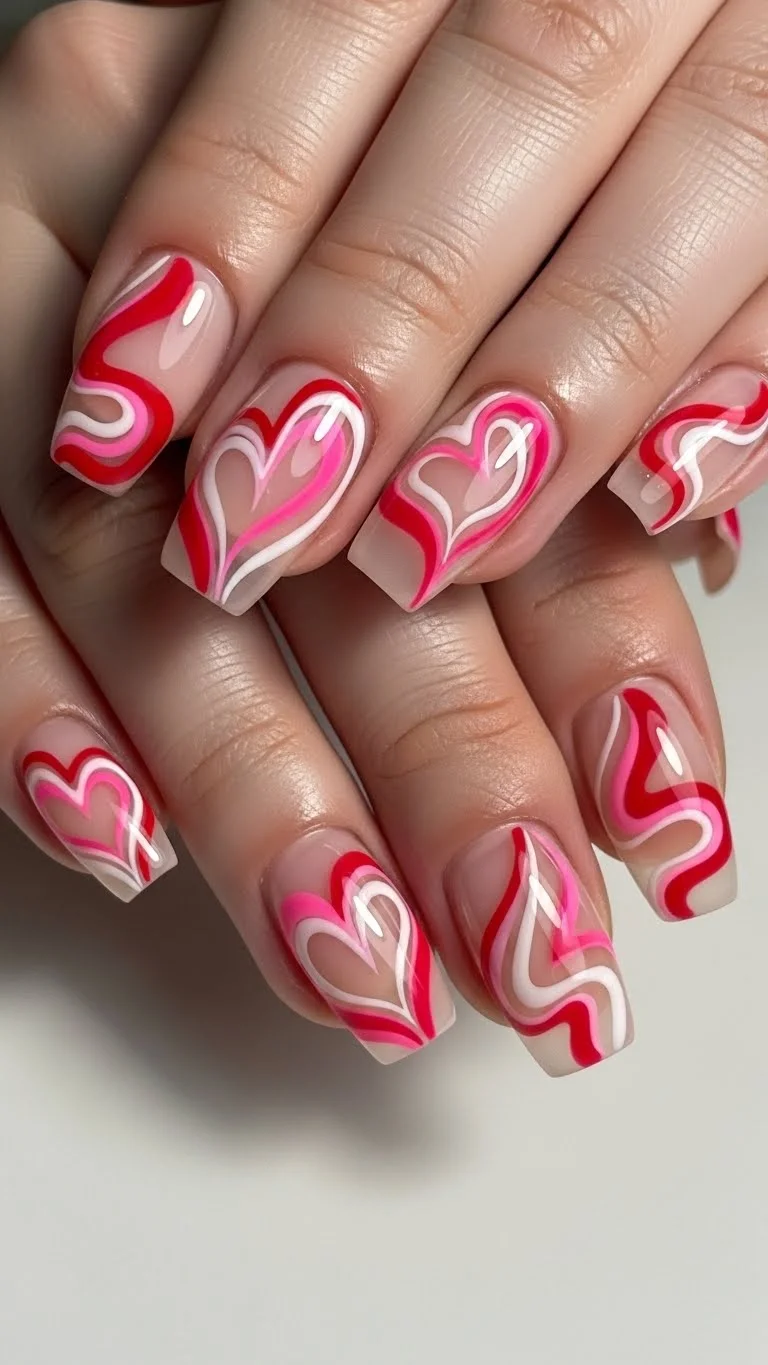 Abstract heart swirls are a creative and artistic way to express love on your nails. Start with a clear or nude base. Using a fine nail art brush, dab small amounts of red, pink, and white polish onto your nail. Then, gently swirl the colors together with the brush or a toothpick, creating organic, flowing patterns that subtly suggest heart shapes or a feeling of romance. Don’t aim for perfection; the beauty is in the abstract nature of the swirls. You can add a tiny touch of glitter before the final top coat for extra sparkle. This technique allows for a lot of personalization and artistic freedom.
- Ombre Hearts

Ombre hearts offer a delicate and artistic touch to your manicure. Begin with a light, neutral base polish. To create the ombre hearts, use a small makeup sponge and two shades of the same color family, such as a deep red and a pale pink. Apply a small amount of each color to the sponge, side by side. Gently dab the sponge onto your nail to create a small heart shape with the ombre effect. You might need to practice this on paper first. Alternatively, use a fine brush to paint the heart outline, then carefully dab the two colors inside the outline for the gradient. Finish with a clear top coat.
- Cupid’s Arrow Drip
![]() The Cupid’s arrow drip design is a fun, whimsical take on romantic nails. Start with a light, neutral base polish. Once dry, use a fine nail art brush and a contrasting color, like red or pink, to paint a thin line from the cuticle towards the tip, mimicking an arrow shaft. At one end, add a small heart or a couple of tiny lines to represent the fletching of an arrow. For the “drip” effect, add a few small, irregular dots or lines along the arrow shaft that look like paint dripping. Seal with a glossy top coat. This creative design is simple and makes a big impact.
The Cupid’s arrow drip design is a fun, whimsical take on romantic nails. Start with a light, neutral base polish. Once dry, use a fine nail art brush and a contrasting color, like red or pink, to paint a thin line from the cuticle towards the tip, mimicking an arrow shaft. At one end, add a small heart or a couple of tiny lines to represent the fletching of an arrow. For the “drip” effect, add a few small, irregular dots or lines along the arrow shaft that look like paint dripping. Seal with a glossy top coat. This creative design is simple and makes a big impact.
- Heart Outline Designs
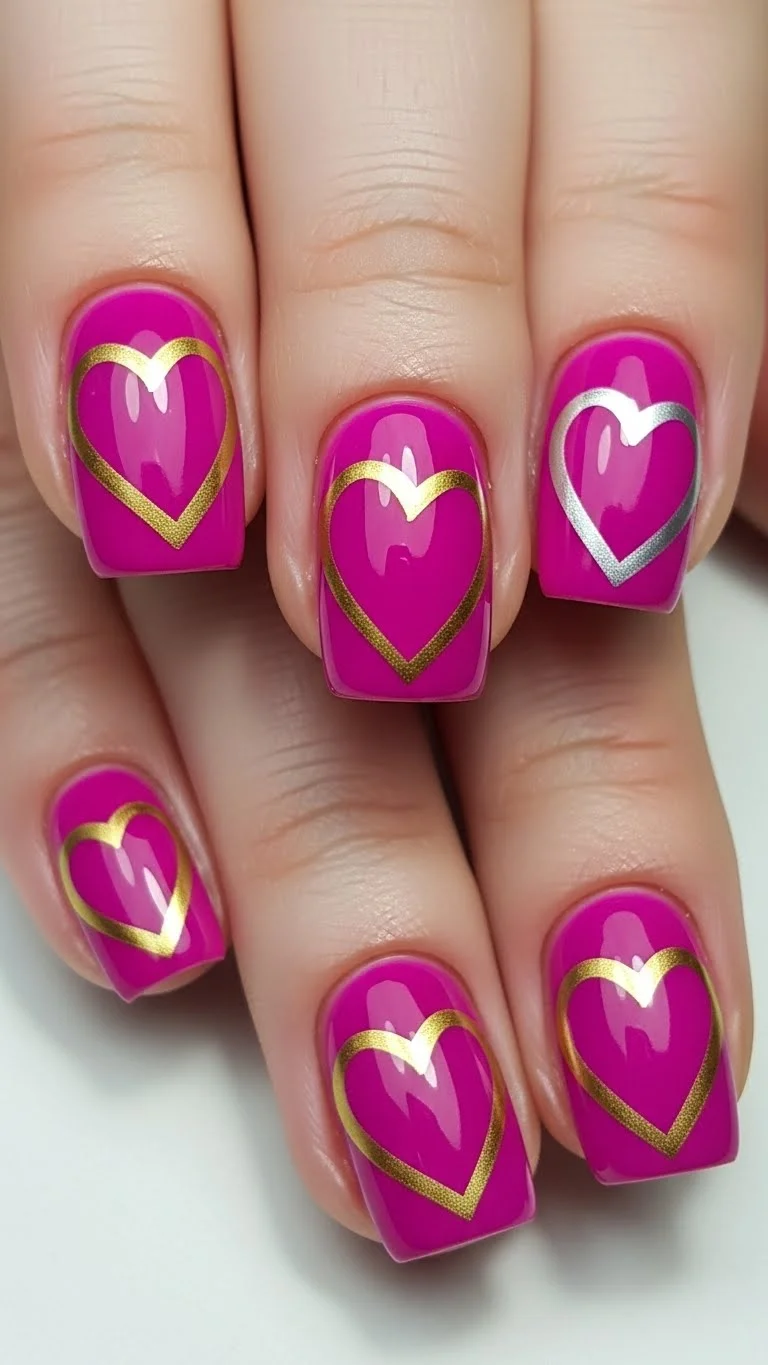 Heart outline designs are chic and minimalist, perfect for a sophisticated look. Choose a vibrant base color like bright pink, purple, or even a bold blue. After your base polish is completely dry, use a very fine nail art brush and a contrasting color, such as gold, silver, or white, to carefully draw heart outlines on each nail. You can make them small and delicate or larger to fill more of the nail. The key is to keep the lines thin and precise for a clean finish. A clear top coat will protect your intricate outlines and add a beautiful shine. This look is easy to personalize and looks very polished.
- Glitter Heart Placement
 Strategic glitter heart placement adds a touch of sparkle and romance without being overwhelming. Start with a sheer or nude base polish to let the glitter truly shine. You can buy pre-cut glitter heart decals or use a heart-shaped hole punch on glitter paper to make your own. Apply a thin layer of top coat where you want to place the heart, then carefully pick up the glitter heart with tweezers and place it onto the wet polish. Gently press it down. Once dry, apply another layer or two of clear top coat to secure the glitter heart and ensure a smooth finish. This simple trick makes a big statement.
- Minimalist Heart Stripes
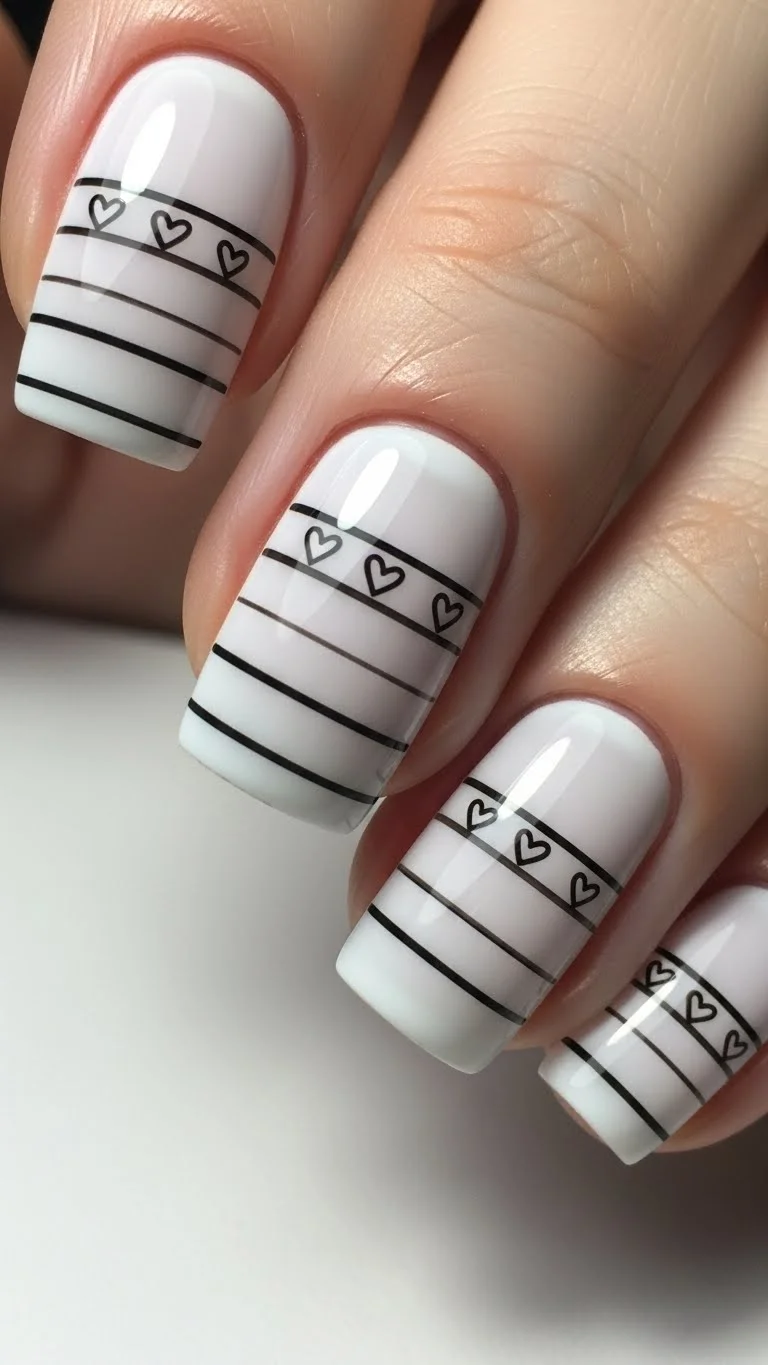 Minimalist heart stripes offer a clean, modern take on Cupid nails. Start with a pale base color like white, nude, or light gray. Once dry, use a fine striping brush and a contrasting polish, such as red, pink, or even black, to create thin horizontal or vertical stripes. For a minimalist heart stripe, integrate tiny, simple heart shapes into the stripe pattern. You can place a small heart at the end of every other stripe or create stripes composed of a series of tiny hearts. The trick is to keep the design simple and uncluttered. Finish with a clear top coat for a smooth look.
- Marble Hearts
 Marble hearts bring an artistic and sophisticated flair to your manicure. Start with a light base color on your nails. To create the marble effect, put a few drops of two or three contrasting polish colors (like pink, white, and a touch of gray) onto a piece of foil. Swirl them gently with a toothpick, but don’t mix them completely. Then, either use a small brush to pick up some of the swirled polish and create a heart shape on your nail, or dab a small piece of plastic wrap onto the swirled polish and then press it onto your nail in a heart shape. Finish with a top coat.
- Delicate Floral Hearts
 Delicate floral hearts combine the beauty of flowers with the romance of hearts. Begin with a soft pastel base color, such as lavender, mint, or baby blue. Once dry, use a very fine nail art brush and contrasting pastel polishes (like white, light pink, or yellow) to paint tiny floral elements. Arrange these tiny flowers and leaves in the shape of a heart on each nail. You can make small clusters of petals to form miniature roses or simple daisy shapes. This design is intricate but very rewarding. A clear top coat will seal the delicate artwork and add shine.
- Gingham Hearts
 Gingham hearts offer a charming, rustic, and very cute look. Start with a light base polish, such as white or pale yellow. Once dry, use a fine striping brush and a contrasting color, like light blue or pink, to create a subtle gingham pattern by drawing thin, intersecting horizontal and vertical lines. Within this gingham grid, you can either leave small heart shapes clear (negative space) or fill them in with a solid color that matches your gingham lines. This requires a steady hand, but practice makes it easier. Finish with a clear top coat to protect your detailed design.
- “Love Letter” Seals
 Love Letter” seals bring a vintage, romantic touch to your manicure. Start with a creamy off-white or light beige base to mimic old parchment. Once dry, use a deep red or metallic gold polish to create small, round or oval shapes on each nail, representing wax seals. While the “seal” polish is still wet, use a toothpick or dotting tool to gently etch a tiny heart or initial into the center of the seal. You want it to look slightly imperfect, like a real wax seal. Finish with a glossy top coat. This unique design is sure to spark conversation.
- Heart Beat Line
 A heart beat line design is a subtle yet meaningful way to express love. Start with a clean, neutral base color like white, nude, or clear. Once dry, use a very fine nail art brush and a contrasting polish, such as red or black, to draw a thin, wavy line across your nail. This line should resemble an ECG or heartbeat monitor. At one point along the line, create a subtle peak that forms a small, simple heart shape. This creates a delicate and personal touch. Seal with a glossy top coat. This minimalist design is unique and very easy to achieve.
- Confetti Hearts
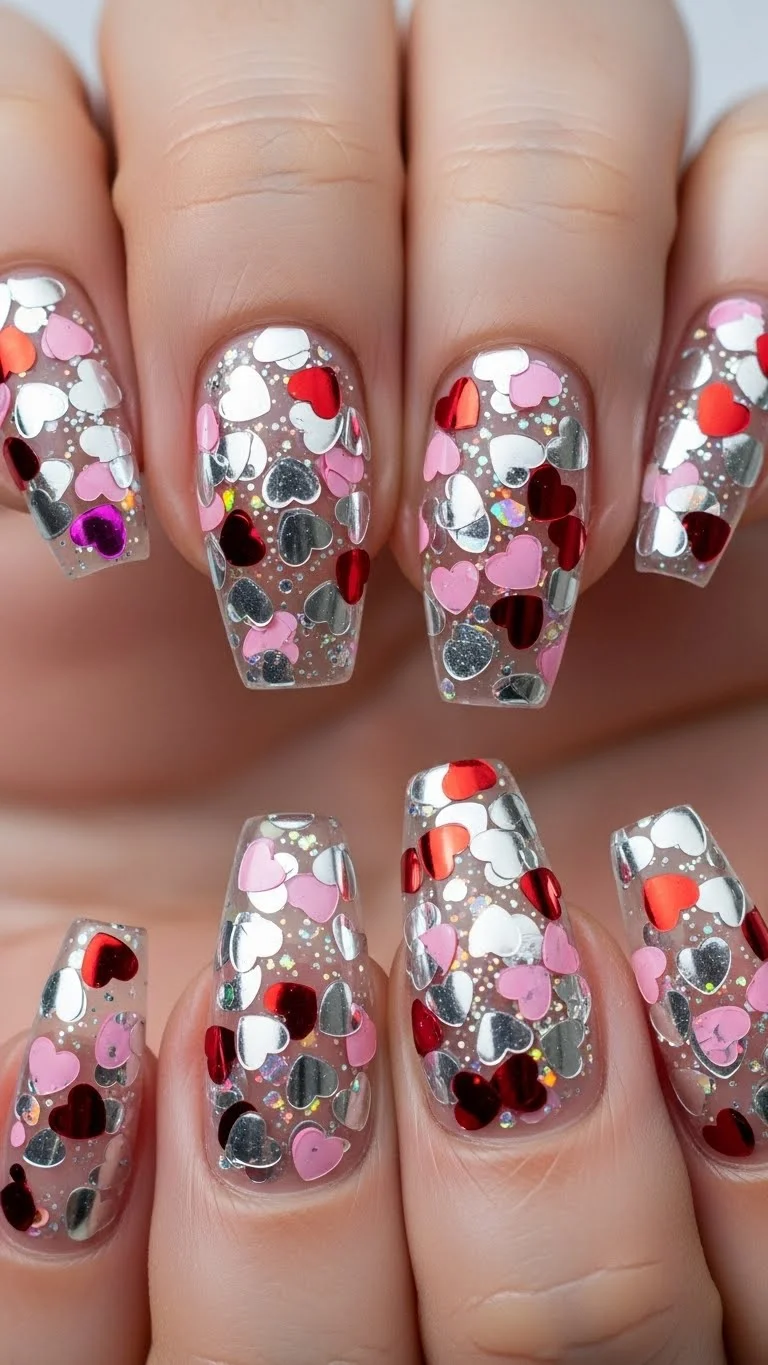 Confetti hearts are a festive and playful way to decorate your nails. Begin with a clear or sheer base coat. You can purchase pre-made heart-shaped glitter or use a small heart-shaped hole punch on thin glitter paper to create your own “confetti.” Apply a thin layer of clear polish to your nail, then carefully pick up and place the confetti hearts onto the wet polish using tweezers. Scatter them randomly or cluster them for a different effect. Once you are happy with the placement, apply a generous layer of clear top coat to smooth everything out and prevent the glitter from catching.
- Reverse French with Heart Details
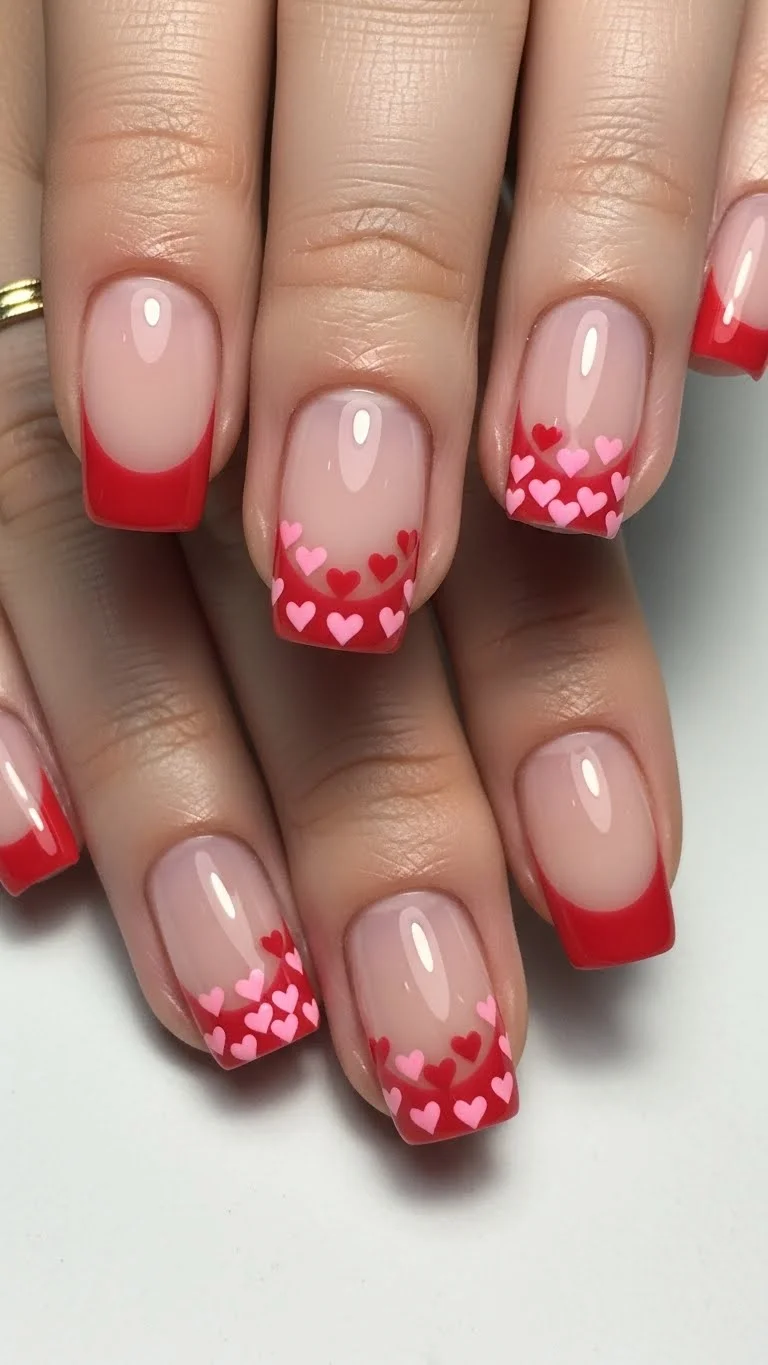 A reverse French manicure with heart details offers a sophisticated twist on traditional nail art. Instead of painting the tip of your nail, you will paint a curved line at the base, near the cuticle. Choose a contrasting color like red, pink, or even a metallic for this “reverse” tip. The rest of your nail can be a neutral shade. Once the reverse tip is dry, use a fine dotting tool or a small brush to add tiny, delicate heart shapes either directly onto the colored curve or just above it, on the neutral part of the nail. Finish with a clear top coat for a polished look.
- Sweetheart Stripes
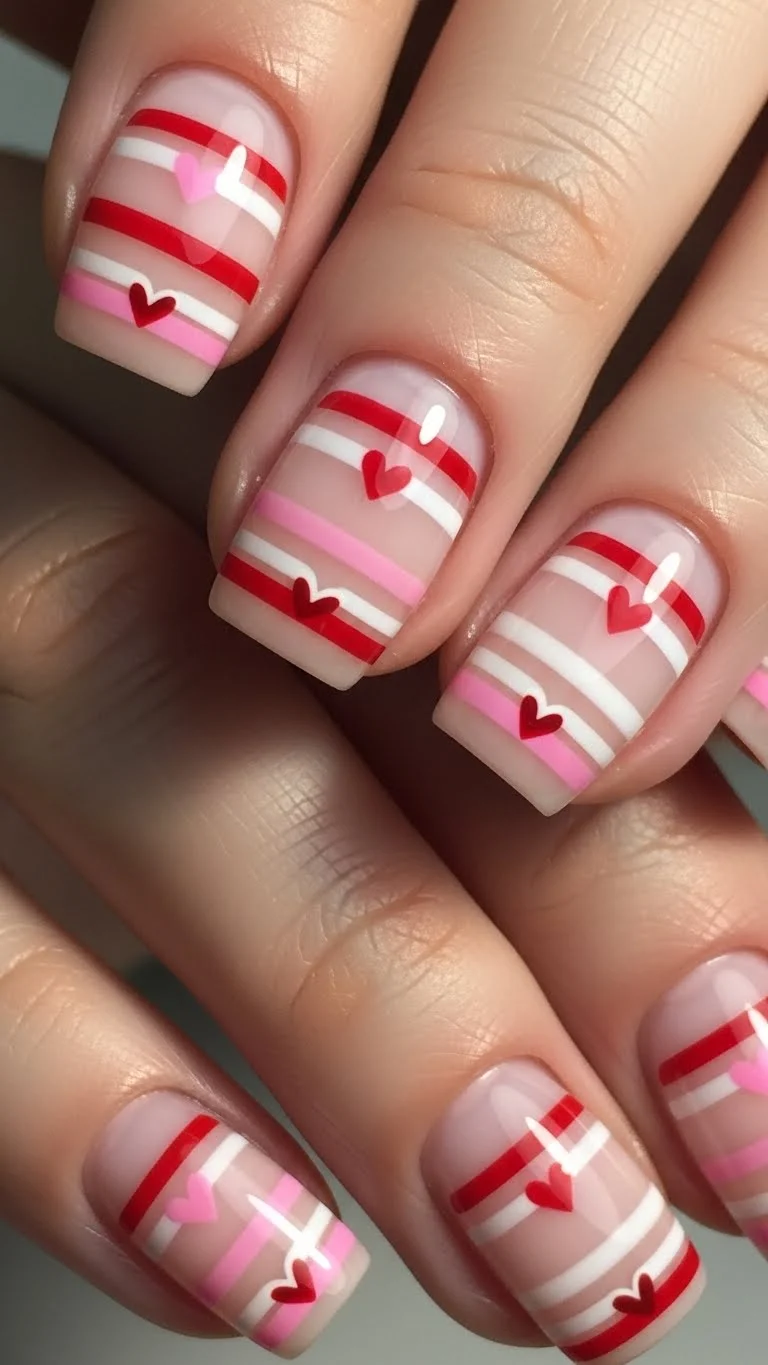 Sweetheart stripes combine classic stripes with a romantic touch. Start with a light, clean base polish, such as white or pale pink. Using a fine striping brush, create several thin, parallel stripes across your nail in alternating colors like red, pink, and white. The key is to keep the stripes neat and evenly spaced. To make them “sweetheart” stripes, every few stripes, subtly incorporate a tiny heart shape into the stripe itself. This could be a small dip in the line forming the top of a heart, or a tiny heart drawn at the beginning or end of a stripe. Seal your design with a clear top coat.
Conclusion
You now have 23 adorable Cupid nail tutorials to try at home! From classic red hearts to playful confetti designs, there’s a look for every style and skill level. Remember, you do not need expensive salon visits to get gorgeous nails. With a little practice, some basic polishes, and these simple instructions, you can create stunning, personalized manicures on a budget. Grab your favorite colors and tools, and let your creativity shine. These designs are perfect for adding a touch of romance to your day or celebrating special moments. Get ready to show off your cute Cupid nails!